Saturday, February 29, 2020

Ocracoke Visit and Quilt Distribution February 2020


I wanted to update the blog on our first trip to the island to distribute the quilts that we'd made so far from blocks arriving from all over the country (and world--I'm looking at you, Australia!). Thank you so much for partnering with me to love Ocracoke and its people. They are a hearty bunch, but this hurricane hit them harder than any storm in many years.

We took the ferry over from Hatteras and were on the boat at sunset. It's a four hour drive from our house to the ferry in Hatteras, so although we left earlyish on Monday morning, we ended up on the 5pm ferry.

I finished binding this quilt on the drive to the island, which gave us 33 Ocracoke Cracker quilts completed, along with 12 other quilts, for a total of 45 quilts to distribute on this first trip.
I'm getting ahead of myself a little. Dennis and I have been following the island's recovery on social media (and of course, sewing and quilting and binding and labeling), and the first week of February I saw a post from Jason Wells, owner of Jason's Restaurant on Ocracoke, that he and his wife Brooke had a load of drywall and subfloor to install in the gutted home they hoped to move into as soon as possible, and could use help with the installation. Of course, drywall is our very favorite thing to do when we volunteer with Eight Days of Hope, so we talked about it, prayed about it, contacted Jason, and volunteered to come help.

Jason is one of those people (and there are a bunch of them) who has been loving his neighbors well. While his kitchen in his restaurant is out, he has been serving meals at the Ocracoke Community Center for six months several times per week, eventually tapering off to just a couple of meals a week. Last Tuesday was the final meal at the Ocracoke Strong Kitchen, so Jason can focus on getting his restaurant open in May.

I'm not going to post a ton of photos of Jason & Brooke's home or their address, but trust me when I say the entire home needed sheetrock from 4' down, and this long entryway/foyer had an open window that had to be framed and closed in. I'm so glad my husband has the tools and ability to do practically anything.
So, we arrived on Monday evening, and went to work on Tuesday morning. We finished two bedrooms the first day while Jason and Brooke installed insulation in their exterior walls, then moved on to mudding (my job on Wednesday) while Dennis trained Brooke how to run the screw gun and then Jason and Brooke took over installing sheetrock themselves while Dennis framed in that window and cut and installed drywall himself in other areas. Thursday they both had other obligations, so we took the morning off to walk the neighborhood by the lighthouse and distribute quilts.

The residential area near the lighthouse is one of the areas with the families who have lived on the island for generations. I bagged up a dozen quilts, and we went for a walk.

We thought it would be easier to offer the quilts as a "gift" (and included the letter explaining our project) from bags, as well as easier to carry. When I deployed with Quilts of Compassion in Texas, we had learned that these bags from Dollar Tree were great for quilts since they are "nondescript" but very loving, so I've been stockpiling them. I thought I had a lot of them, but I've run out. If you have a Dollar Tree and want to pick up bags to send with your blocks, I'd appreciate it.

It was truly a "coincidence" (we understand Providence) that we were distributing quilts on February 13 & 14!
My sweet husband ADORES cats. The cats on Ocracoke have their own social media (Ocracats!) and came running to welcome us to the island. Okay, mostly welcome him, because Dennis and cats are like peas and carrots.

It slowed us down a little...but oh, how he loved the cats.

We distributed a dozen quilts that morning door-to-door, and met some very sweet residents at their homes. Various stages of rebuilding were in action, really all depending on how much assistance they'd been able to get or how many skills they already had. We met a few people that I "knew" from our social media connections, so I made sure to get those helpers a quilt.

Friday morning we finished up the drywall installation at Jason and Brooke's house, and Dennis decided that we'd try to catch an afternoon ferry and head home.

We had decided that since Jason was serving lunch at the kitchen that I would be able to distribute the rest of the quilts to residents as they arrived to pick up their lunch.

I had bagged up all the remaining quilts, including using a few pillowcases that had been donated as bags for larger quilts. Dennis was visiting with residents, and almost forgot to snap a picture. At this point, I only had five quilts left! Also, you'll notice that I didn't dress "fancy" for distributing quilts. I was hanging drywall that morning, so I went in my work clothes. Remember, it isn't about how you LOOK, it's about how you LOVE.


I saved a special quilt for Jason and Brooke, of course. We also sent one to Brooke's grandmother and to their son (which happened to be 100% cat fabric, and so perfect for an Ocracoke young man).

Pictures started showing up on social media after we left.

And of course, even an Ocracat got to enjoy a quilt! (This quilt is one of the "Super Cracker" quilts that I made.)
 Since we returned, I've resumed piecing and quilting and binding and labeling quilts to prepare for our next visit. I expect that may wait until June to give us time to have 50 more quilts ready to go. If you are working on blocks, please send them to me as you can. I really love the scrappy quilts that are made by as many as 42 different quiltmakers! They have a spectacular vibrancy.

But you know what!?!? I love packages like this, too! Since I've returned, I got a box with a finished, quilted and bound Ocracoke Cracker quilt from a quiltmaker in Virginia...


...And this box from my dear friend with the Alamance Piecemakers near Burlington, NC, who have decided to work together to make finished quilts to send me as often as they get a couple done. What a blessing!

If you've made it this far, thank you for reading my ramblings. There's so much more I could share, and so many more stories. Coming up in March, I am visiting the Twin Rivers Quilt Guild in New Bern to update them on the project (and thank them for the HUNDREDS of blocks they handed to me at our Day of Sharing in December). It truly takes more than a village to pull off a project like this. I am just one person, and I personally have made three quilts from start to finish, and contributed a big ole stack of blocks to the scrappy quilts. But together we had 45 quilts to distribute thanks to your block donations, your top donations, your finished quilt donations, and your love for Ocracoke. I quilted up two more tops yesterday, and have bindings to add to three quilts this weekend. Maybe I'll get one or two more in the frame before Monday.

Continue to pray for Ocracoke. Schedule your summer vacation there, or shop their businesses online. And send me blocks! I still need at least 4,200 more blocks to make another 100 quilts.

PS We did get to eat some wonderful food on the island, but right now, only about five restaurants are open. We got our morning coffee fix at The Magic Bean, ate amazing food for lunch from the Suazos food truck, had great options two nights at Plum Pointe, Sorella's Pizza one evening, and then topped off the week with an extravagant meal at The Flying Melon for our Valentine's Day. As if I didn't already adore Ocracoke...oh, the carbs! LOL! It was divine.

Tuesday, October 22, 2019

Ocracoke Quilts Update


I wanted to update you on the latest news about the Ocracoke Quilt Project, and let you know how you can help in ways beyond sending blocks. (Please, keep sending blocks!)

My guild has a retreat at Ft. Caswell in October (and again in January) that I had scheduled to attend way back during this summer, so I took the stack of blocks I'd received in the mail to date, as well as the ones I still needed to add triangles of my own, to work on that weekend. So many of my Greenville Quilters Guild friends have committed to helping me make blocks and/or quilts for Ocracoke that several other retreat attendees were working on blocks that weekend as well. A few people love Ocracoke so dearly that they are making entire quilts that they are insisting on finishing themselves...which of course, is always welcomed and appreciated!
Members of the Greenville Quilters Guild on retreat at Ft. Caswell. Five tops finished that weekend.

I do want to mention that ANY quilt that you'd like to send to Ocracoke is welcomed. While I am providing the Ocracoke Cracker block as a block drive so that we can make 50" x 60" comfort quilts, I am more than willing to deliver any new quilt that you feel led to make and contribute. I won't have time to offer longarming for those quilts, but if you have finished quilts to send, please do.

A variation on my Leftovers pattern, my friend Chris pieced and donated this beautiful quilt for Ocracoke.


I have been invited to go to My Sewing Shoppe in Raleigh, NC on November 5 and teach the Ocracoke Cracker block (as I've drafted it for this project), as well as hold a block drive to collect as many donated blocks as possible. That means Raleigh-Durham area quilters can just drop their blocks off at My Sewing Shoppe by November 1, and I can pick them up while I'm there!
Please note that I'm "IslandTimeQuilting" on Instagram. I am SO EXCITED about this opportunity to meet some Raleigh area quiltmakers and spread the word about this project.


My personal goal is to finish 10 quilts per month until May 2021. That's 200 quilts completed that I will personally deliver to Ocracoke residents, probably quarterly, as they continue to recover from the impact of Hurricane Dorian in their community. In order to finish that many quilts, I will need to continue receiving blocks from all of you. But I also know that we together can do so much more than I can do alone. I have a great community of support here in Greenville. My Sugar Creek Quilters have been meeting in my home for nearly 15 years now, and many of them will help me piece tops, and complete them with binding and labels. The Greenville Quilters Guild has many extraordinarily generous members, and they are making blocks, piecing tops, and offering to bind and label as well. But I have also received offers around the country (heck--around the world) to do the same thing, and it's so encouraging. I may change my mind in 2020, but for now, if you are a quiltmaker that would be happy to piece an entire top, quilt it and bind it, then please--partner with some local friends and make one or two or ten, and just send me finished quilts. I'd rather not send out kits for piecing/quilting/binding and then you have to ship them back. That money can go toward buying more batting and thread and backing fabric here.

The exception is for eastern North Carolina! If you are a longarm quilter or quiltmaker that wants to get involved, and live within driving distance of me here in Winterville, please just send me an email and let's plan how you can partner to finish one or more of these quilts. I chose the 50" x 60" size of these quilts very purposefully--most domestic sewing machines can quilt this size pretty easily. You don't have to own a longarm to be able to finish a comfort quilt for Ocracoke.

Now, for the big update...In less than six weeks, I have received over 700 blocks! I have five quilts quilted (working on binding the four I quilted yesterday), and another 11 sets sorted to be pieced into tops. With just another 168 blocks, I can meet my November goal. Of course, if you want to send 6 or 18 or even 42, all are welcome!

Eleven more quilts just waiting to be assembled!

Thank you again for showing your love for Ocracoke. Please keep lifting them in your prayers. If you are a social media fiend like I am, follow #ocracokestrong to witness the most amazing stories of neighbor loving neighbor.

You all know I'm an atrocious blogger. But I will try to keep you in the loop. Best bet is to follow me on Instagram or my Facebook page!

One final thing--I did make a "variation" on the Ocracoke Cracker quilt by just placing my strip sets on point with solid squares. It's a lovely quilt, and might be the one you'd like to make yourself at home. It takes less fabric, but I cannot promise that it is ANY faster. I called it "Ocracoke-ish" and drafted clear cutting directions into my new 2020 Quilter's Planner. There are some directions on my IG account post here.

Ocracoke-ish, uses 48 strip set blocks and a background fabric.

I use my Quilter's Planner FOR EVERYTHING.


Friday, September 20, 2019

Ocracoke Cracker Blocks for #quiltsforocracoke


October is for OCRACOKE!

This picture is one of my favorite pictures I have ever shot with my iPhone over my shoulder as we flew into W95, Ocracoke airfield. You can see vehicles parked in front of Howard’s Pub, and the lighthouse in the distance.


Dennis and I try to visit Ocracoke as often as possible, even if it’s just for Sunday lunch. We love the land, the ocean, and the people of Ocracoke dearly. I am “Island Time” Quilting because of Ocracoke. I have warned Dennis that if he doesn’t complete life with me, my final years will be on Ocracoke.

If you feel inclined to pray, please lift up this sweet fishing and tourism community on our Outer Banks. Ocracoke has its own quilt block, the Ocracoke Cracker block, as seen in the first picture. It’s traditionally set on point with blue corners, four narrow strips set with a red strip in the third position. I would love to do a quilt drive for OI, especially using the Ocracoke Cracker block, which will add up fast.

Here’s the scoop on how to make #ocracokecrackerquilt blocks:

(1) Cut 2” strips in four colors, with red and blue in the center. The two outside strips can be beige, white, yellow, green, even purple or orange! Just make sure red/blue in the center.


(2) Sew a strip set, and press seams in one direction.


(3) Crosscut into 6.5” squares. Trim your outside strips if necessary. I got 3 blocks from each 21” strip set.


(4) Cut a variety of blue 5.5” squares, and then on the diagonal to make HSTs. Sew on opposite sides of the strip set, centering the point on the center seam. Press, trim, and sew on remaining sides.


(5) Trim block to 9” unfinished (leaving good 1/4” seams at the points).


I think the variety is what will make these quilts sing, so I would love your blocks mailed to me so that we can mix them up into gorgeousness. But if you want to finish an entire quilt, I would appreciate that so much! If you want to help piece tops or quilt or donate backing fabric or help in any way, I would love that, too. There are approximately 1500 residents on Ocracoke Island, many of whom are now homeless. I am able to deliver the quilts myself, personally, to the residents of the island, over the next several months. Let’s see how the fall quarter goes, and then we’ll make a 2020 plan!

I am envisioning a quilt containing 42 blocks, which is about 50x60” without borders. I am hoping for #comfortquilts more than replacing bed linens, if you know what I mean.

Mail blocks to:
#quiltsforocracoke
Island Time Quilting
1524 Sugar Creek Rd.
Winterville, NC 28590


Thank you, dear ones. Continue to pray for my sweet Ocracoke. For those of you who aren't familiar with how Hurricane Recovery can go, I spoke with a sweet family we served in Friendswood, TX in March 2018 (after the devastation from Harvey in 2017) last night. They hope to get the kitchen installed in their home in October, TWO YEARS LATER after Harvey flooded their home. Ocracoke's recovery isn't a one-month process. I am dedicated to taking quilts to Ocracoke regularly over the next several years, Lord willing. The purpose of a #comfortquilt is to let the recipients' know how they are loved, how they are prayed for, and how much we believe in them, even when life is hard. My daughter is currently designing a label for the project, and I hope we can successfully show Ocracoke that they are in all our hearts.


#islandtimequilting

Monday, April 30, 2018

May is Tailwind Month!


I'm going to host a sew-along on my Instagram account this month. That sounds like a big deal, but honestly, I overgram there all the time, so what's really going to happen is that I'm going to make a bunch of Tailwind blocks, figure out how I want to set them, and sew them up with some kind of directions for every one who wants to follow along.

Usually I have a bit more of a plan when I am starting something new, but since I designed this block four years ago, I haven't really designed a different setting than my original "Island Flight" quilt design. There are a lot of options for a 8" finished block, particularly since this one can easily be set on point. After all, airplanes have all sorts of attitude. I think I'll end up making Tailwinds from both my hoarded stash of Janet Clare's Flight fabric for Moda Fabrics, and also from my stash.

AOPA design.


I got this amazing t-shirt when we were at Sun 'N Fun last month, and it's inspired me to make a "girly" aviation quilt. I routinely hear, "Oh, good, an airplane block is perfect for my grandson/son/nephew," but I like to remember there is a rich history of women in aviation. In fact, it was the professionalism of the recent Southwest Airlines accident that prompted me to finally get the Tailwind block on paper and online after four years.

If you want to sew-along, I'll post here once a week or so, but Instagram is usually every day (and more than once, to be honest), so follow me there for the latest. You'll find all the instructions and the template in my previous post HERE and it's really up to you just how big you go with the finished quilt. Personally, I want to make a boy version baby quilt and a girl version baby quilt, and then I may make a lap quilt for my kids (so, times two). I bought five yards of the Kona Cobblestone background pictured above, and will probably use Kona Silver or Kona Snow for my "girl" version. You can get two airplane blocks from ONE 2.5" width of fabric strip by adding your background of choice.

Pull out some fabric today, and let's start sewing tomorrow!

And by the way, in case you don't know, we are a retired USAF family. My hubby builds experimental aircraft for fun (he's finished three), and is also an airframe and powerplant certified mechanic. He's currently rebuilding a 1968 Citabria 7KCAB. For fun, we participate in our local Experimental Aircraft Association chapter, and we just recently finished the Wright Flight Program this year, where we flew 183 fifth grade students (and a parent) for a "first flight" reward for achieving their goals in that program. We try to attend both Sun 'N Fun and Oshkosh AirVenture every year. So, spending May making planes is just another month in aviation for me. GRIN.


Friday, April 20, 2018

Tailwinds: An Original Design


In late fall of 2013, our dear friend Steve Merritt asked me to design a quilt that we could auction for Bahamas Methodist Habitat, a charity organization that my husband and I support. I was inspired to make an airplane block after not finding anything out there in "quilt land" that suited me. I hate to applique, and really prefer simple patchwork. Plus, I like to be able to use precuts or small scraps, and an 8.5" block seemed the size that would be conducive to baby quilts as well as the queen-sized quilt I wanted to make. I took my sewing machine with me to my in-laws for Christmas vacation, and around the holiday activities, began to piece and sew what I labeled my "Skittle Squadron" of rainbow colored airplanes. My hubby is an actual airplane builder (having built three experimental airplanes in our garages in three states), and quickly identified my design as a "Tailwind." I said, "What makes it a Tailwind?" and he said, "Just look at it." Okay, honey, Tailwind it is.


This pattern is 100% rotary cut and machine pieced, but did require an odd angle for the fuselage, so I drafted a template. Templates aren’t really that hard to use, but sometimes it’s easier to mark the finished corner with a little pencil dot for pinning. There is no reason for you to “start or stop” at those marked corners in this pattern. The seams are ordinary scant-quarter inch seams. As always, I recommend you make one “test” block, and then start chain-piecing your squadron. You can easily cut a plane or two from a jelly roll strip or a layer cake square.

You will find these written instructions and the templates in the Google Drive located here: Click HERE to get the instructions  and here to get the templates Please understand that I am a complete novice at sharing something as complicated as a hand-drawn template on the Interwebs (LOL) so I hope this works. Please feel free to use the scale included on the drawing to draft your own cleaner copy of the template. It's really very easy! Ask questions if you think of any.

FOR EACH BLOCK

From Airplane Fabric Cut:

A (empennage):        1.75”x 4” rectangle
B (fuselage):              template B from 2.5” strip
C (wings):                  2.5”x 8.5” rectangle
D (cowling):               two 1.75” squares

From Background Fabric Cut:         

a (empennage):        two 1.75”x 2.75” rectangles
b (fuselage):             template b
br (fuselage):            template b reversed
c (cowling):              two 1.75”x 4.5” rectangles

INSTRUCTIONS

1.     Cut all pieces as instructed. The B and b templates are very simple angles for rotary cutting and piecing. You might find it beneficial to make these templates out of template plastic or heavy cardstock if you are making a squadron of airplane blocks. Marking your corners makes things easier to line up and pin on your template pieces.


From top to bottom, units A, B, C and D (times 2).
2.     Piece B to b and br (b reversed). Press toward B. Trim unit to 4”x 8.5.”


Leave a little tiny triangle at the top and bottom to allow for the angle of the turn. Alternatively, mark your quarter inch seam and pin. I'm usually too lazy to pin.
3.     Piece a + A + a. Press toward A.

Piece your empennage A (tail) between two pieces of background a.
4.     Piece sew-and-flip triangle corners on D with c to form cowling.  Trim away the extra triangle.  Press one unit toward D and one toward c. Piece these two units together. Pieced unit should measure 1.75” x 8.5.”

5.     Sew four sections together. Block measures 8.5” x 8.5.”


Since I'm sure someone will wonder, the auction and/or raffle for this quilt never came to fruition. I even had raffle tickets printed (with a date over a year away), but as many volunteer organizations go, we just never started selling tickets or advertising the quilt. So, "Island Flight" is still in my private collection. My good friend Steve lost his life earlier this year in a small plane accident, so it is now too precious to me to sell or donate, and will remain in my private collection for the rest of my life.

Here's my original sketch on graph paper after I decided how to set my "Skittle Squadron" into the quilt Island Flight. I set everything on point with 8.5" squares to float the planes, and pieced a border of pinwheels and squares for the outside edge.


I have a fat eighth bundle of Janet Clare's "Flight" fabric that she designed for Moda Fabrics set aside to make another quilt using my Tailwinds block, and thought I'd offer a sew-along for those of you who want to make a cute little baby quilt! I'm going to pair it with a nice background solid, and toss in a few of Lisa Bongean's Liberty Gatherings as well. Maybe raid my stash for some patriotic reds...or even a gold or two. Keep in mind that you really don't need a large piece of scrap to make one plane. If you can get the wing (2.5" x 8.5") then you just need tiny pieces for the rest. 

Let me know if you plan to "sew-along" with me and make your own Tailwinds quilt! My original quilt was named Island Flight (2014) for our wonderful Bahamas Methodist Habitat organization and a fabulous ministry they provide on the islands. I'm still figuring out my April-June schedule, so you have time to do a fabric pull and make some choices for your own version.

Lori 


Tuesday, January 23, 2018

Webbing a Quilt Top

 I taught a workshop at my local quilting guild on Saturday, January 20, using my "Leftovers" pattern. It was less about this-not-very-complicated-pattern, and more about the quick piecing techniques and quick cutting techniques I routinely employ to finish numerous quilts in a very short time.

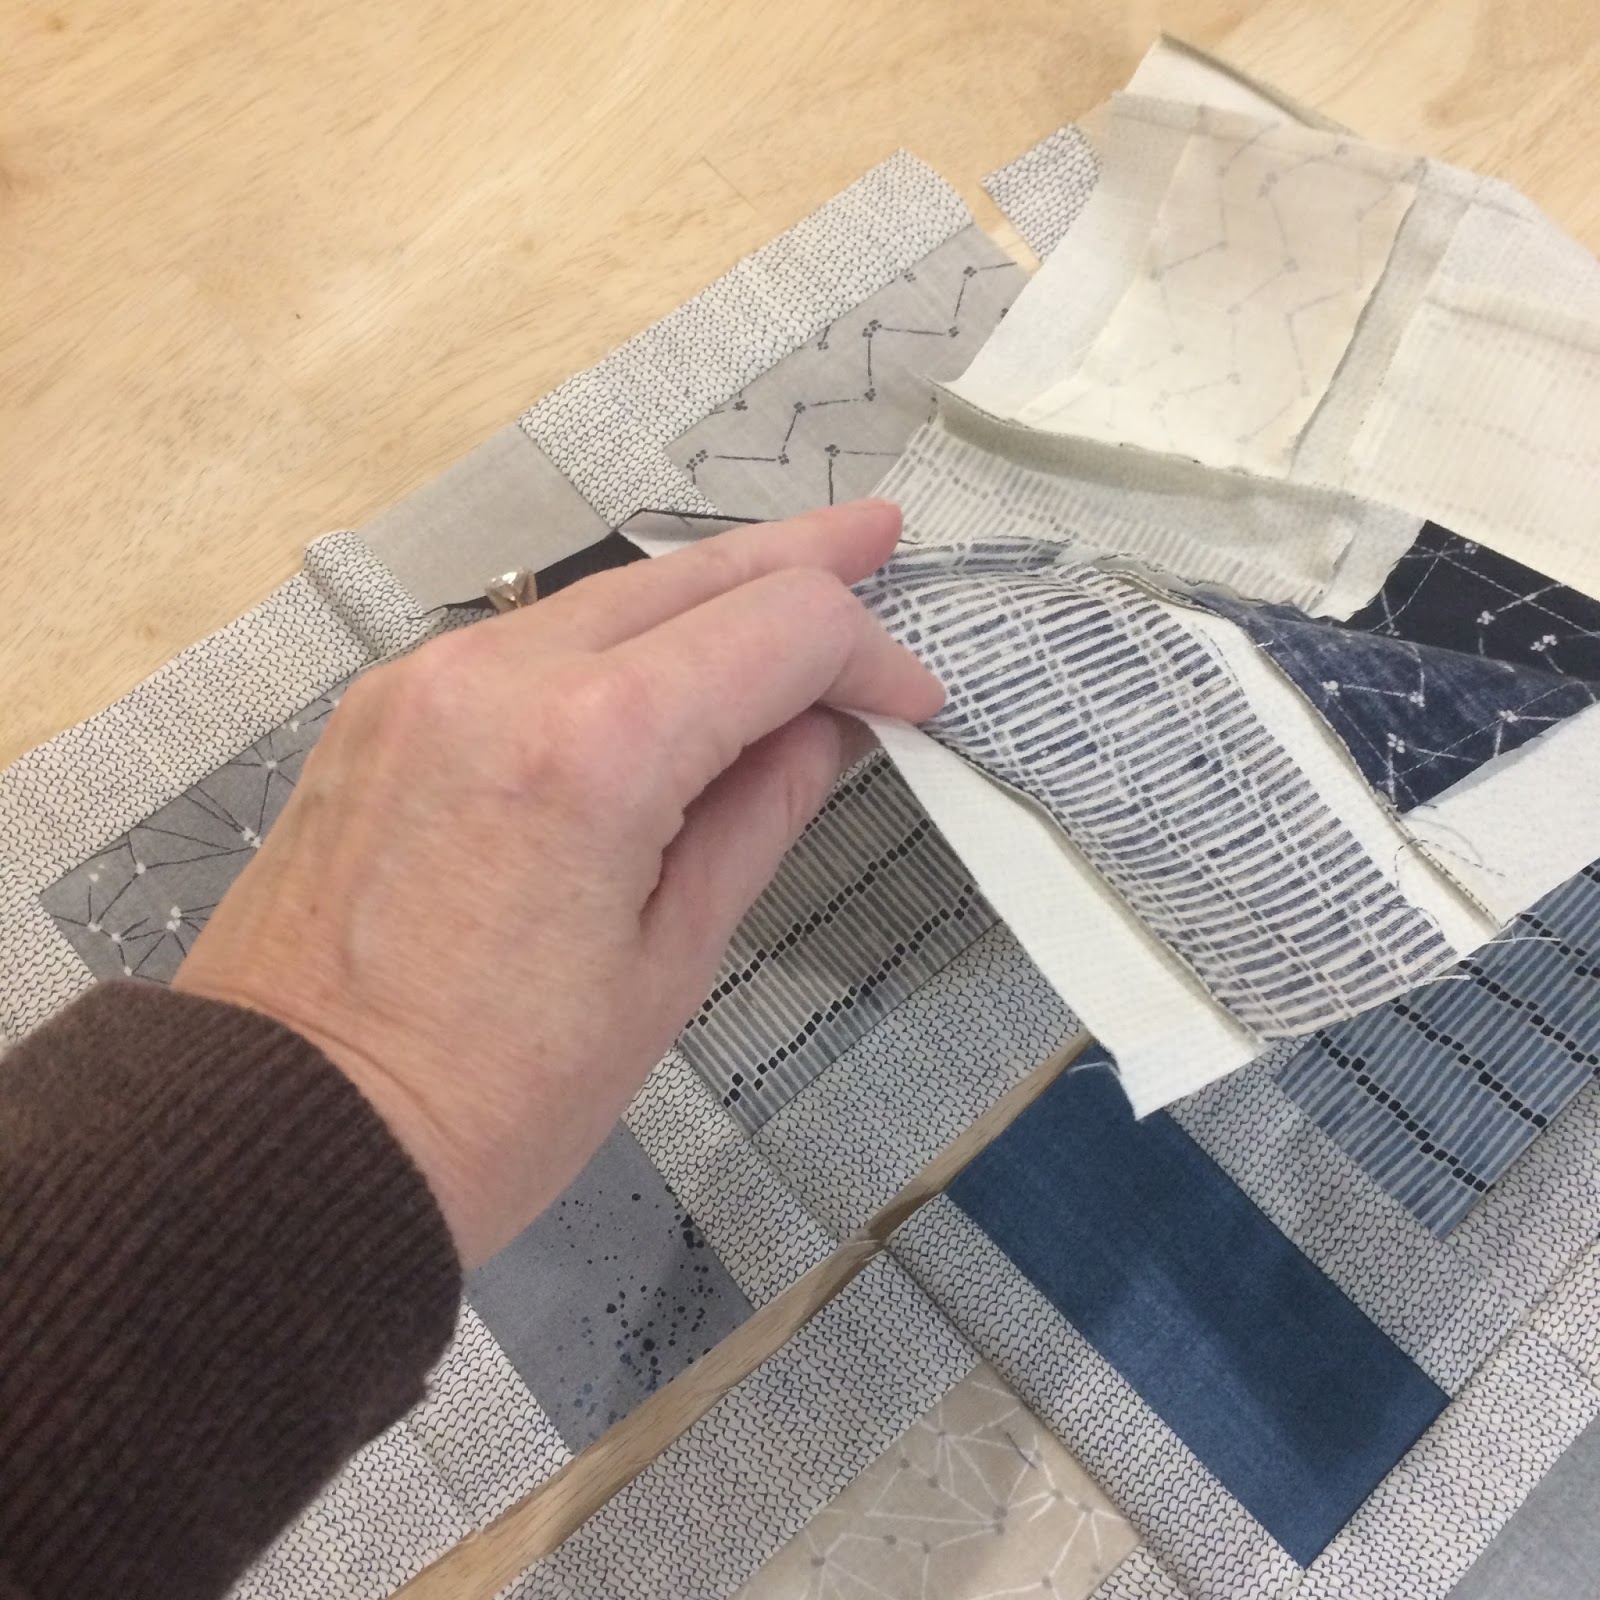
One of the techniques I demonstrated was "webbing a quilt top." It's like chain piecing on steroids. I love to web a top, and I use it to put blocks together, sections of quilts together, and entire quilt tops whenever possible. It means I can lay everything out on the floor, decide how I like it, pick it ALL up at one time, then sew, sew, sew until the top is pieced.

Webbed rows ready to piece
Leftovers (typical size), without borders
This quilt was a bit unusual, since it was a teaching sample. I pieced half of the quilt during class as a demo (actually I showed up at class with 10 blocks finished, and just pieced half of the blocks, and the top, in the rest of class to "lead the way," so to speak). I wasn't using a charm pack, but instead had fractured a layer cake for this quilt, and had 3 yards of that great Hearty Good Wishes II background fabric on hand, so I could go bigger.

When I came home, I pieced another "half" of the quilt (which is actually the typical number of blocks generated with a charm pack). So, I can demo webbing on half of this quilt, but if I had the whole quilt to make at one time, I'd have webbed the whole thing at once.

Half already pieced on Saturday, half of the blocks made Monday awaiting chaining/webbing

This is the half I'll web.
Ideally, you web an even number of columns. It doesn't matter how many blocks are in each column, but if your quilt lays out as a 4x5 (like this one does), I treat them like two stacks of five.

Begin by laying the right-hand block on top of the left-hand block, flipping it so that you'll sew the right seam. Think of it as laying block 2 on top of block 1, if that helps.

Flip column 2 onto column 1, and column 4 onto column 3.

Pick them up in one stack of 10-seams-to-sew. I pick them up from top left down the first column, then top right down the second column.

Chain piece your block pairs through.

Ten seams sewn.

If you have table space, you can pull them straight out. You'll clip ONE joining thread between the fifth and sixth pair (so that you again have two columns of five block pairs.

Open up the Column 1-2 pair, and flip over on top of it the Column 3-4 pairs, again so you can sew the five seams that connect your rows together.

I usually do this without even getting out of my chair, but I was trying to show you a clear picture.

Because everything is chained together, your pairs of blocks will feed up toward the needle from your lap. Just chain-piece them through.

Webbed!

When you open it out flat, you can see that each seam in the rows are connected by the tiny chain of stitches. Nothing can flip. No row can end up upside down. You can take a break without worrying about forgetting where you are.

See the tiny webbing?

Now you are ready to just flip a row over on the row next to it, and stitch from side to side.

Two seams sewn, and two to go on this half of the quilt!

Finished! It is at this point that I iron. Yes, you heard that right...I am just finger-pressing the seams until I have the whole top together. I'm a heretic like that.

Here's the quilt before its outside border...

And I went with seagulls for the outside border. I'm a longtime Jonathan Livingston Seagull fan.
I hope this pictorial tutorial helps you understand webbing. It is so powerful! I can web a charity quilt in an hour, usually, and it gets them done and in the frame that much faster. As I told my guild today at our Day meeting, the problem isn't how fast I sew...it's no matter how fast I sew, I cannot seem to sew faster than I shop!